Table of Contents
Windows Server 2008 boot from SAN
Installation
Start by installing Windows Server 2008 to a physical disk. It is best to use an external USB, FireWire, or eSATA disk; this will make later stages easier.
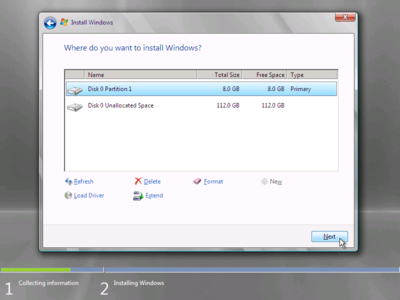
When installing, use a small partition (around 8GB) rather than the whole disk. At the “Where do you want to install Windows?” screen, click on Drive options (advanced):
Click on New and enter 8192 as the size (in MB), then click on Apply to create the partition. You should then see a screen that looks like:
Select the newly-created partition, and click on Next to install Windows Server 2008 to this partition. The rest of the installation will proceed as normal.
Preparation for SAN boot
Now you must select which SAN technology you will be using:
- iSCSI support is built in to Server 2008. If you are booting from iSCSI, you can immediately transfer the Windows Server 2008 disk image to your iSCSI target.
- AoE support must be installed separately. If you are booting from AoE, you must first add AoE boot support to Windows Server 2008.
- SRP support must be installed separately. If you are booting from SRP, you must first add SRP boot support to Windows Server 2008.

