Table of Contents
How to configure Microsoft DHCP Server for gPXE
- This section is about defining DHCP options for your gPXE clients.
- If you need to set up your Microsoft DHCP Server to chainload gPXE to existing PXE clients, follow the guide here first.
Overview
gPXE clients have two main methods for performing actions after they acquire an IP address from a DHCP server. You can use gPXE scripts to tell your clients what to do after acquiring an IP address, or you can configure the appropriate DHCP options on your DHCP server, and your clients will perform the appropriate actions based on the options that are configured.
When configuring your gPXE clients to use a script file as per the PXE chainloading setup guide, typically you would configure a web server to generate gPXE scripts on demand for individual (or unknown) clients using a server-side scripting language such as ASP or PHP. These scripts would be assigned at the Server or Scope levels, and then scripts can report identifiers back to the web server for comparison against a database with conditional logic for further script generation.
This guide focuses on using simple DHCP reservations to allocate resources to gPXE clients. This allows you to utilize gPXE to perform network booting of your clients without requiring advanced scripting logic or a web server, nor will you need to maintain scripts on a web or TFTP server.
Setting up a DHCP Reservation
Before you can configure individual clients' behavior, you need to create a DHCP reservation. Options configured under this reservation are what allow you to individualize their PXE boot behavior.
- First, open the DHCP console, and connect it to your DHCP Server. You can do this by right clicking DHCP at the top of the console, then click Add Server. Type in the server name in the This server: edit box, or select it from the list of authorized DHCP Servers on the bottom.
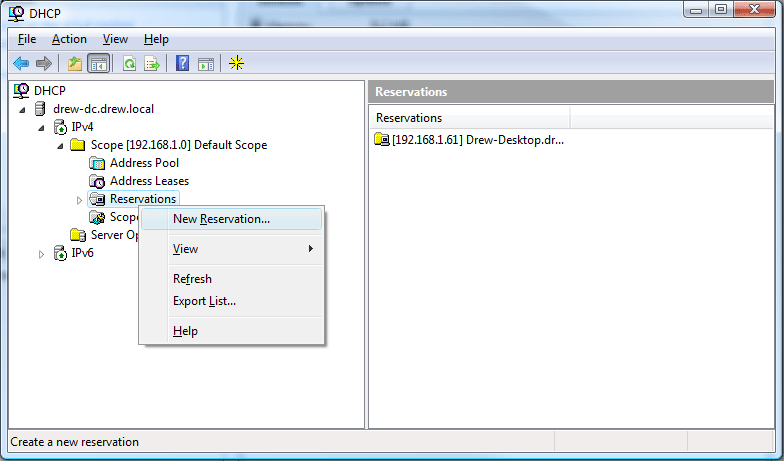
- Once you've done that, expand the server's name, then, if necessary, expand the protocol you're using (here we use IPv4) and expand the scope that corresponds to your network. Finally, right click Reservations in that scope, and click New Reservation.
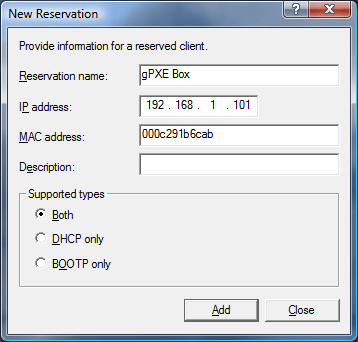
- In the New Reservation dialog box, give the client a friendly name, assign an IP address, then enter the MAC address of the NIC you'll be using for your PXE boot. When you're done, click Add down at the bottom of the dialog. If you have more than one client to add, you can do so in the same fashion, otherwise, click Close.
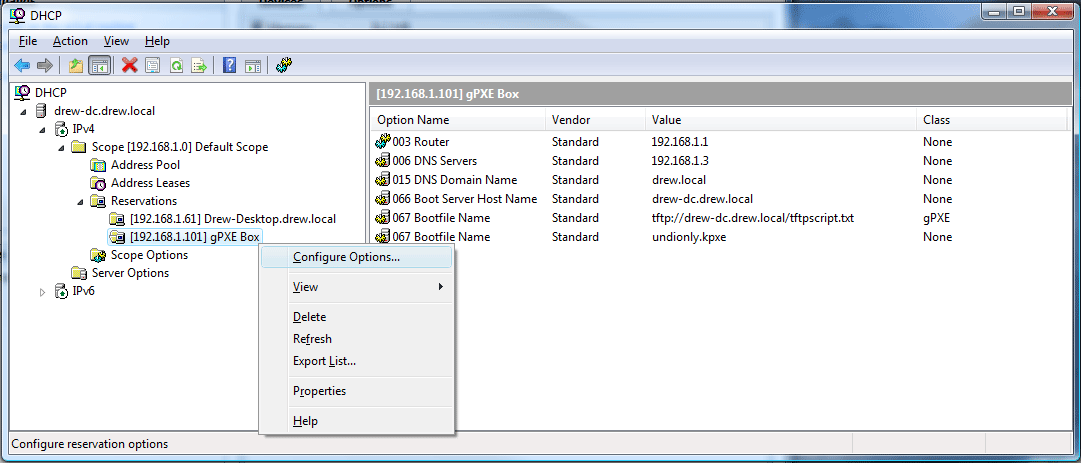
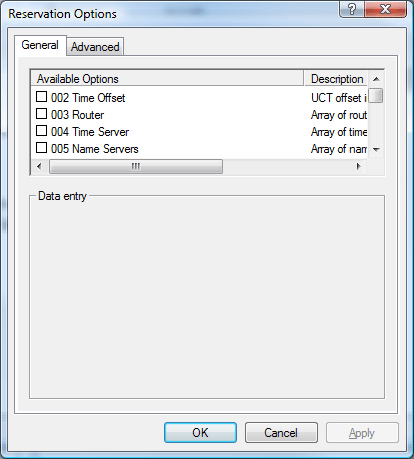
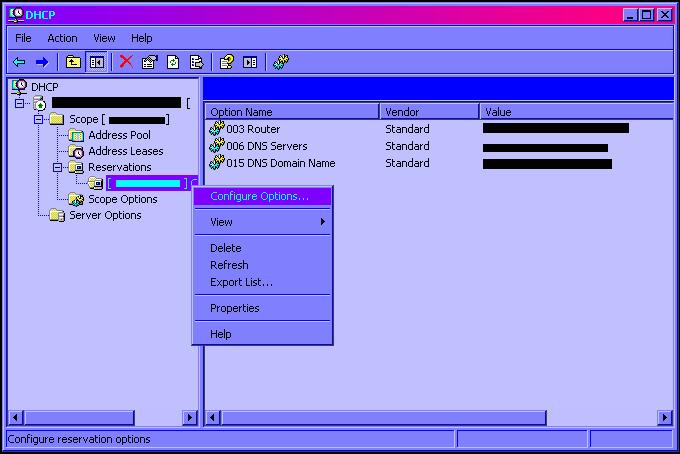
- Now, you can expand Reservations on the left side. Right click your client and click Configure Options.
- These options are what we'll modify to make use of gPXE's various network boot capabilities.
Setting up a gPXE Encapsulated Options on Windows DHCP
Unfortunately, this is fairly tricky and involves manually editing the array of bytes that will be sent to the gPXE client in DHCP option 175, which is where Etherboot/gPXE encapsulated options go.
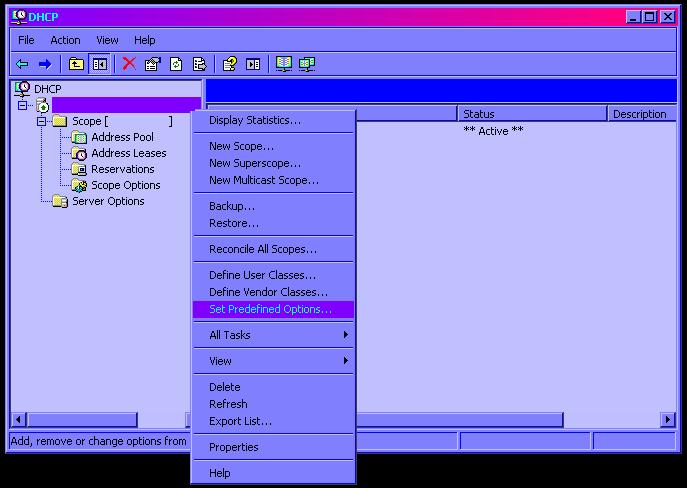
Firstly, you need to create the encapsulated options. Right-click on the server, then choose “Set Predefined Options…”
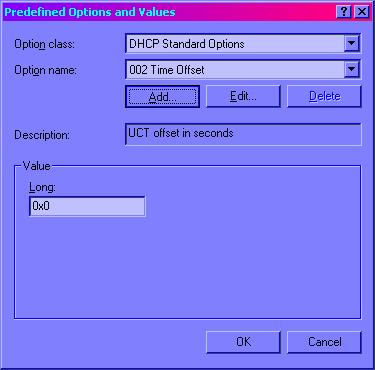
Click the “Add…” button.
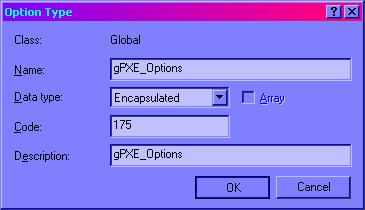
Use the following options then click the “OK” button:
Name: gPXE_Options
Data type: Encapsulated
Code: 175
Description: gPXE_Options
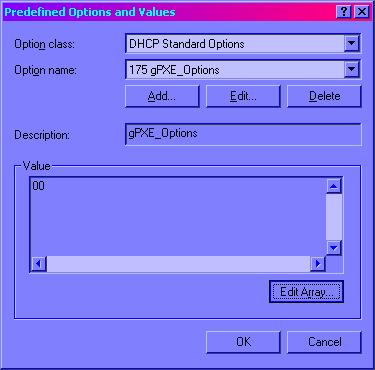
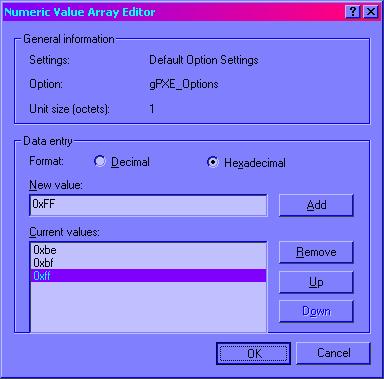
Click the “Edit Array…” button:
This is where you can manually enter some defaults. We'll use iSCSI username and password as an example. We see from gpxe/src/include/gpxe/dhcp.h that the username option is 0xBE and the password option is 0xBF. So add these along with an end-of-option code and click the “OK” button:
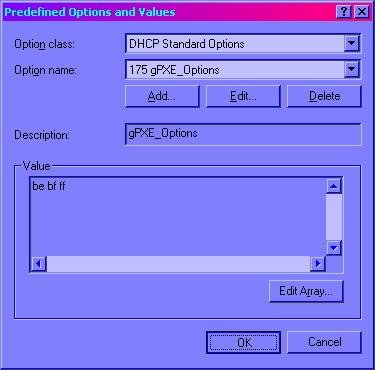
0xBE 0xBF 0xFF
Back in the “Predefined Options and Values” window, click the “OK” button:
Now choose a client who you'd like to configure specific options for in the “Reservations” area. Right-click and choose “Configure Options…”:
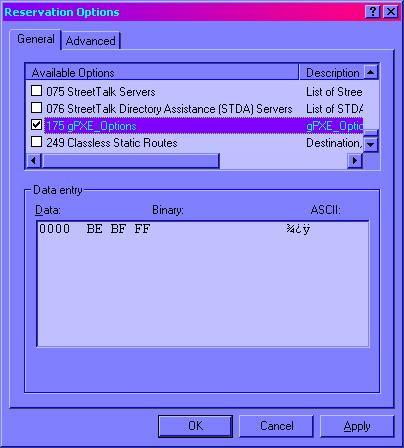
Find the gPXE_Options with code 175 that you defined:
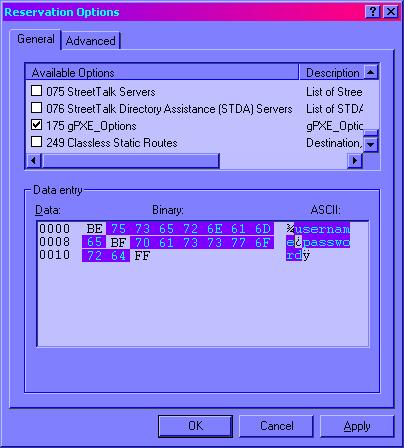
Now you can manually add in a username and a password, following the respective options numbers:
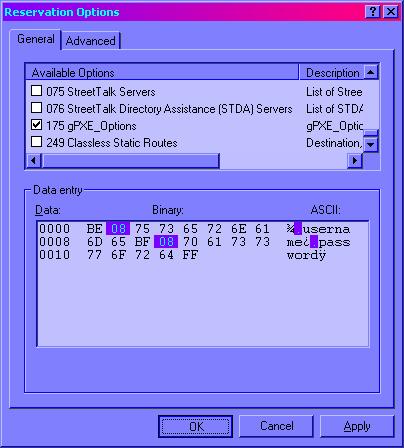
Now you must insert the length for the username, and the length for the password. In our example, “u s e r n a m e” and “p a s s w o r d” are both 8 characters long, so we use the hexadecimal value for 8. The length field goes right after the option field. Once entered, you may click the “OK” button:
