Table of Contents
Booting Windows PE
Overview
Windows Preinstallation Environment (WinPE) is a network-bootable version of Windows designed for installation, troubleshooting or system recovery. It is not a general-purpose Windows system; it can be used only for these specific tasks. If you want to boot a fully functional version of Windows, you need to Boot from SAN instead.
Obtaining Windows AIK
Windows PE is available as part of the Windows Automated Installation Kit (AIK). Download the AIK from its home page at http://www.microsoft.com/downloads/details.aspx?FamilyID=94BB6E34-D890-4932-81A5-5B50C657DE08&displaylang=en, or from the direct download at http://download.microsoft.com/download/9/c/d/9cdfa30e-5901-40e4-b6bf-4a0086ea0a6a/6001.18000.080118-1840-kb3aikl_en.iso.
Install the AIK onto a working Windows system (the “technician computer”). The installation requires around 1GB of disk space.
Setting up WinPE
Open the Windows PE Tools Command Prompt (Start → All Programs → Microsoft Windows AIK → Windows PE Tools Command Prompt) and enter the following commands (some of which are case-sensitive). Note that if you intending to install a 64 bit version of Windows, the second command below should specify “amd64” instead of “x86” (amd64 is a generic reference to 64 bit support which includes support for both AMD and Intel based 64bit hardware):
  mkdir C:\Temp
  call copype.cmd x86 C:\Temp\Boot
  del /Q etfsboot.com
  move ISO\boot\boot.sdi boot.sdi
  rmdir /S /Q ISO
  imagex /mount winpe.wim 1 mount
  copy mount\Windows\Boot\PXE\pxeboot.n12 pxeboot.n12
  copy mount\Windows\Boot\PXE\bootmgr.exe bootmgr.exe
  copy mount\Windows\System32\bcdedit.exe bcdedit.exe
  imagex /unmount mount
  rmdir /Q mount
  bcdedit -createstore BCD
  set BCDEDIT=bcdedit -store BCD
  %BCDEDIT% -create {ramdiskoptions} -d "Ramdisk options"
  %BCDEDIT% -set {ramdiskoptions} ramdisksdidevice boot
  %BCDEDIT% -set {ramdiskoptions} ramdisksdipath \Boot\boot.sdi
  for /f "tokens=3" %a in ('%BCDEDIT% -create -d "Windows PE" -application osloader') do set GUID=%a
  %BCDEDIT% -set %GUID% systemroot \Windows
  %BCDEDIT% -set %GUID% detecthal Yes
  %BCDEDIT% -set %GUID% winpe Yes
  %BCDEDIT% -set %GUID% osdevice ramdisk=[boot]\Boot\winpe.wim,{ramdiskoptions}
  %BCDEDIT% -set %GUID% device ramdisk=[boot]\Boot\winpe.wim,{ramdiskoptions}
  %BCDEDIT% -create {bootmgr} -d "Windows Boot Manager"
  %BCDEDIT% -set {bootmgr} timeout 30
  %BCDEDIT% -set {bootmgr} displayorder %GUID%
  del /Q bcdedit.exe
Note: When using inside a batch file, replace %a with %%a (twice) in the “for” command parameters.
Transferring WinPE to a TFTP server
Copy the C:\Temp\Boot directory to your TFTP server. The Boot directory must appear directly within your TFTP server's root. For example, if your TFTP server is running on a Linux system and the TFTP server root is /var/lib/tftpboot, then the C:\Temp\Boot directory must be copied as /var/lib/tftpboot/Boot.
Several of the filenames are case-sensitive, and you must ensure that the case is preserved when you copy the files. Assuming that your TFTP server root is /var/lib/tftpboot, the filenames should appear as:
/var/lib/tftpboot/Boot/var/lib/tftpboot/Boot/pxeboot.n12/var/lib/tftpboot/Boot/bootmgr.exe/var/lib/tftpboot/Boot/BCD/var/lib/tftpboot/Boot/winpe.wim/var/lib/tftpboot/Boot/boot.sdi
Configuring DHCP and TFTP
Configure your DHCP server to hand out “\Boot\pxeboot.n12” as the boot filename.
For ISC DHCPD, you can do this by adding the following to /etc/dhcpd.conf.
  next-server XXX.XXX.XXX.XXX;
  filename "\\Boot\\pxeboot.n12";
where the next-server details either the IP address or DNS hostname of your TFTP server.

Note that you must use a backslash (\) as the path separator, rather than the more usual forward slash (/). If you use a forward slash, pxeboot.n12 will be unable to locate bootmgr.exe and the boot will fail. Your TFTP server must be configured to support the use of backslashes as path separators; see Supporting broken TFTP clients for instructions on configuring your TFTP server to do this. Note also that each backslash is doubled within /etc/dhcpd.conf; this is because ISC DHCPD treats a backslash as an escape character.
For Microsoft DHCP Server, set the following options
  Option Number       Option Name           Value
  066                 Boot Server           XXX.XXX.XXX.XXX
  067                 Bootfile Name         boot\pxeboot.n12
where option 66 refers to your TFTP server's IP address or DNS hostname.
Booting WinPE
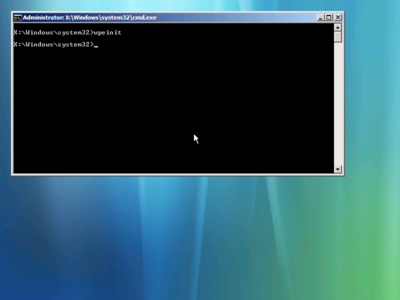
Boot your diskless client using gPXE. If all has gone well, you should see it boot from your WinPE image. It takes quite a long time, since WinPE downloads over 160MB of data via TFTP and also seems to occasionally spend several minutes sitting at a blank screen apparently doing nothing.
Congratulations on a successful boot of Windows PE!

